6 Strategies for Taming Midrange in a Busy Mix
10/25/2019
Article Content
Achieving a well-balanced midrange in a recording is one of the biggest challenges of mixing. Beginning producers especially tend to struggle in this area. The ranges of many instruments overlap quite a bit, and some negotiation will always be necessary to help them share space in a mix. Muddy room resonances only complicate things further. When we have a session with a busy arrangement and high track count — a pretty common occurrence in digital recording — midrange problems can multiply out of control.
Midrange clarity is one of those factors that can separate a great mix from a mediocre one, and it’s a big reason many self-producing artists will still call in a pro to help with a final mix. If shelling out for a professional mix engineer isn’t an option, there is still hope for a busy mix to shine. The key to finding clarity is in a measured approach, one where we never lose sight of the big picture. Here are some strategies to try when your mix is stuck in the mud:
1. Identify the Most Important Elements
While artists and producers can often get attached to every element of their recordings, realistically, there will nearly always be only a handful of parts that are truly central to the song. Even in a busy arrangement, not every element needs to be heard upfront. Making choices about what’s essential and what’s not is the first step to improving clarity in a mix.
No matter how much is going on in a recording, the average listener’s ears are only going to gravitate to a couple of elements at a time. Try to find 3-5 central instruments or themes that are the foundation of the arrangement. These elements may not be only one track — a stack of vocal harmonies or a full drum groove might each function as a unit when breaking a mix down this way.
Once we’ve found the core instruments of the song, the next step is to identify where they sit in the frequency spectrum. These most crucial elements often require the most sonic real estate. Find the fundamental frequencies for those instruments (the frequencies of the actual notes of the part), and whatever other frequencies help those parts shine through. Many EQ plugins feature frequency analyzers that help with this task.
For the rest of the arrangement, the goal will be to make those instruments shine in more limited areas. Having a clear roadmap of the arrangement is crucial to making good mix choices down the line. Time spent understanding the song on this level is time well spent.
2. EQ Cuts to Improve Clarity & Headroom
The right kind of surgical EQ can help a mix open up. Out of control, low-mid frequencies, near the fundamental tones of many instruments, can lead to muddy, indistinct sounds. With too much information a bit higher, things can sound boxy or honky. Poorly treated rooms will accentuate these frequencies.
Starting just above 1 kHz and going up to 5 or 6 kHz, things can begin to get abrasive or harsh. Electric guitars and cymbals often have resonances between 2-4 kHz that can get especially ugly, and can obscure the body of the sound.
In some instances, high-pass filtering (filtering out low frequencies, “passing over” higher ones) can even be used to tame midrange mud. Many recorded instruments will have quite a bit of noise or subharmonic information pushing up well into the midrange. When the root notes of the part sit in the upper midrange, it’s generally a safe move to filter out the subharmonic information and noisy rumble that lives below.
Though it may seem counterintuitive, cutting these sorts of problem areas can make instruments feel louder. Often, unwanted frequencies obscure the real core sound of the instrument. After making some surgical cuts, and gain-correcting on the EQ’s output volume control, some instruments can really leap forward.
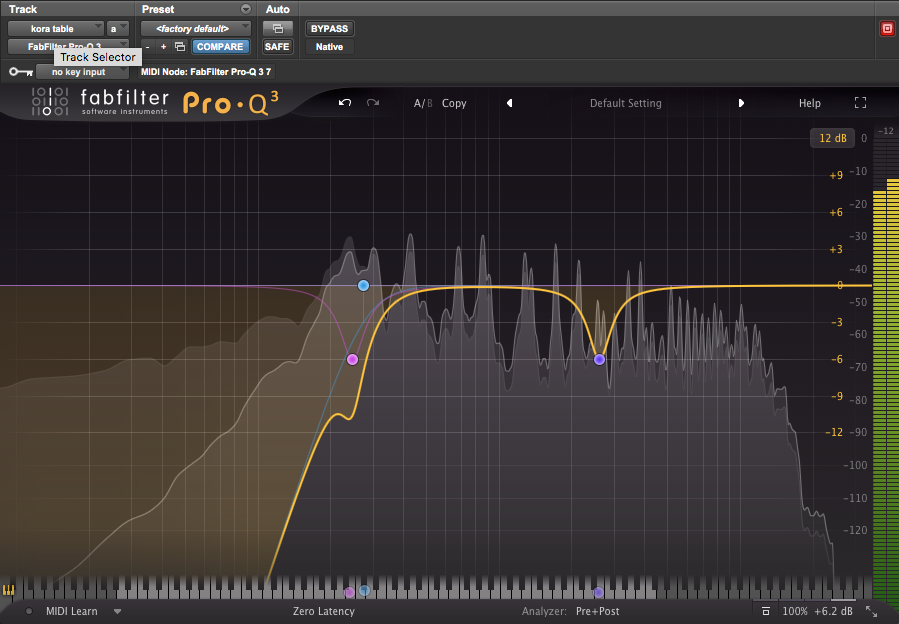
The example below is a sample of a Kora (a West African string instrument) manipulated heavily through a modular synth rig, from a piece by composer Nick Sena. I removed noise and a low-mid woody rumble with a high pass filter and a deep cut around 250 Hz and addressed some high-mid hiss with another narrow cut. The “after” is not technically louder than the “before,” but we hear more of what we want from this instrument and less of the noise that would only serve to clutter the mix.
Before
After
3. Carve out Space for Lead Instruments
It’s very common to hear multiple instruments playing in the same frequency range in a given recording. The natural ranges of many instruments overlap quite a bit, and a certain amount of competition between parts is unavoidable.
Multiple instruments fighting for space in the same frequency range perfectly illustrates why having a sense of what’s essential in a mix is crucial. It’s common for guitars and vocals to compete in the lower midrange. If we have a clear sense of what needs to be heard and what’s less important — in this case, the vocal needs to sit above the guitar — it’s much easier to negotiate a compromise between the two. We can easily create room for the vocal by making a broad EQ scoop across the range where the vocal’s fundamental frequencies sit, and the two are competing.
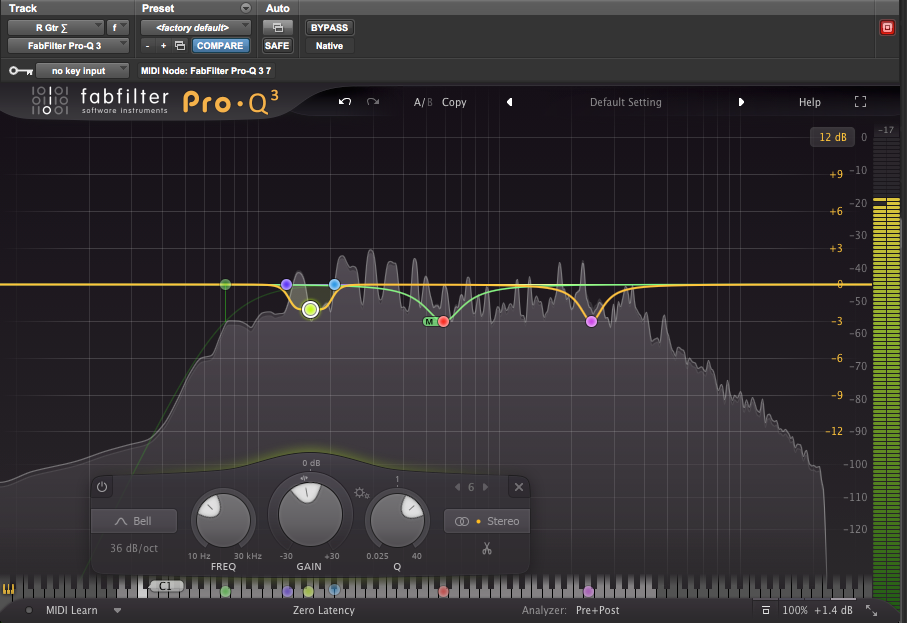
In the example below, a song by Suicide Mike, I made broad cuts to the rhythm guitar and synth bass tracks, targeted just to the range of the lead vocal (you can see the markers I made on the Pro-Q 3 to show the high and low points of the vocal). The result is more clarity from the vocal, with little lost from the guitars and bass.
Before
After
4. More Control With Multiband Compression
Sometimes an instrument will feel like it’s contributing to crowding at a given frequency, but EQ cuts make it feel too thin. Other times, something may need specific frequencies boosted, but doing so also adds mud. In these sorts of situations, multiband compression (and dynamic EQ) can be the perfect tool for the job.
For those not familiar with multiband compression, it’s a relatively simple concept: the sound is split into different bands (low, middle, high, etc.), which can each be compressed separately. Faster attack times will help reign things in when transients are the problem; slower release times will tame sustain. Dial compression on frequency bands as needed to make controlled cuts or boosts.
Dynamic EQ functions similarly to multiband compression, though the two are not identical, and there are some crucial differences. For this article, both are good options when all-out cutting or boosting with EQ isn’t working.
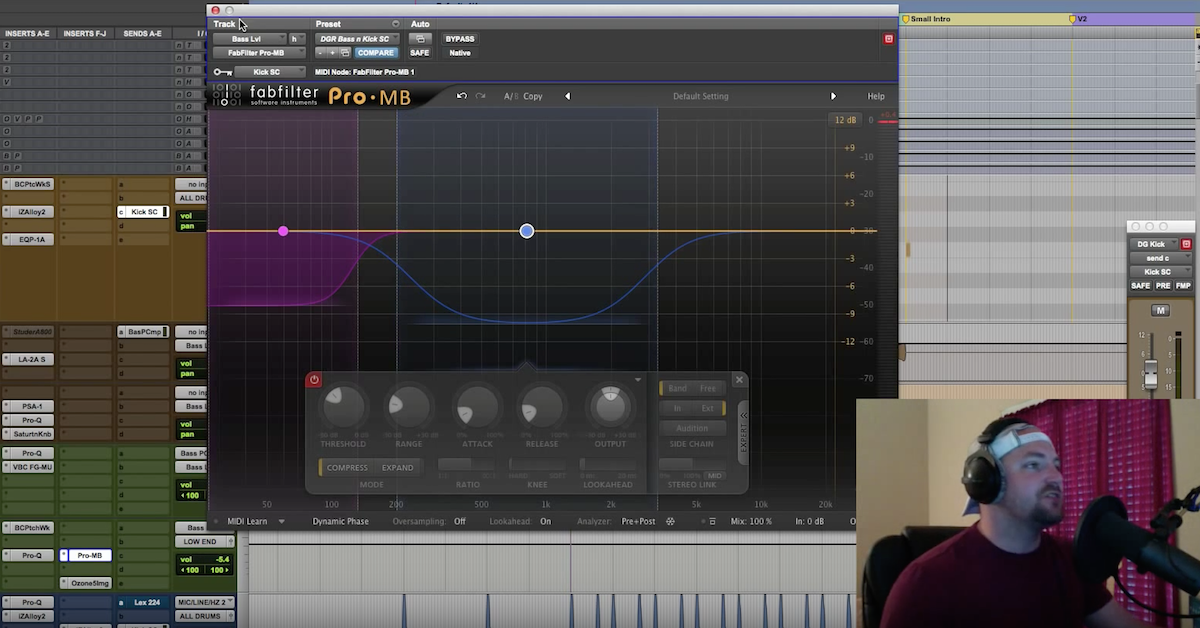
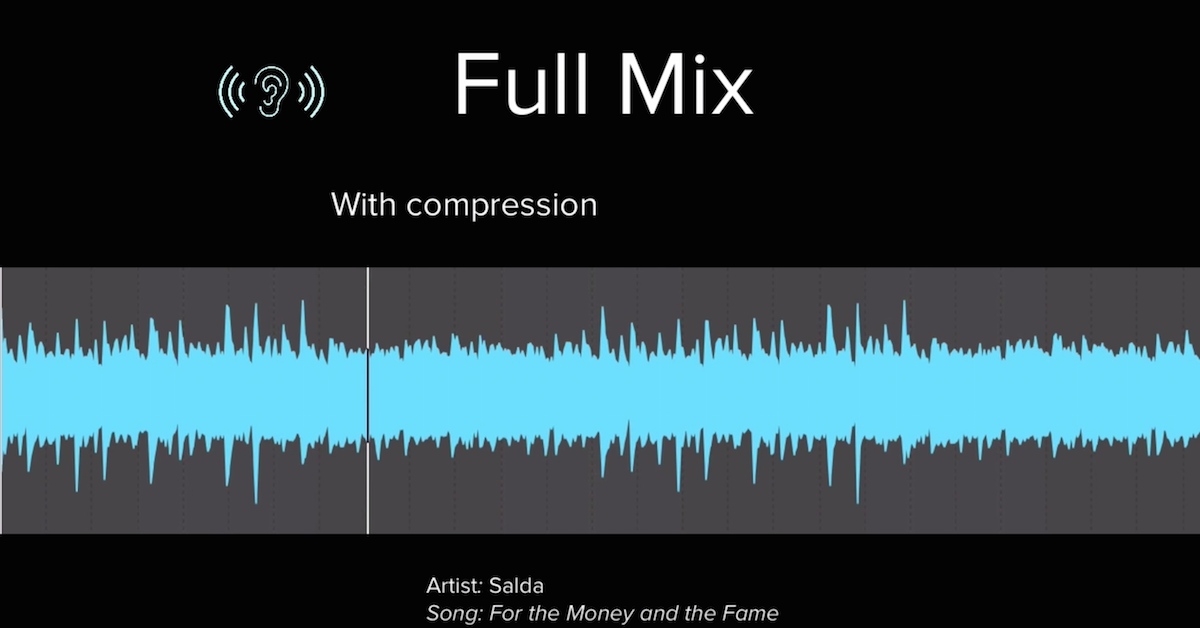
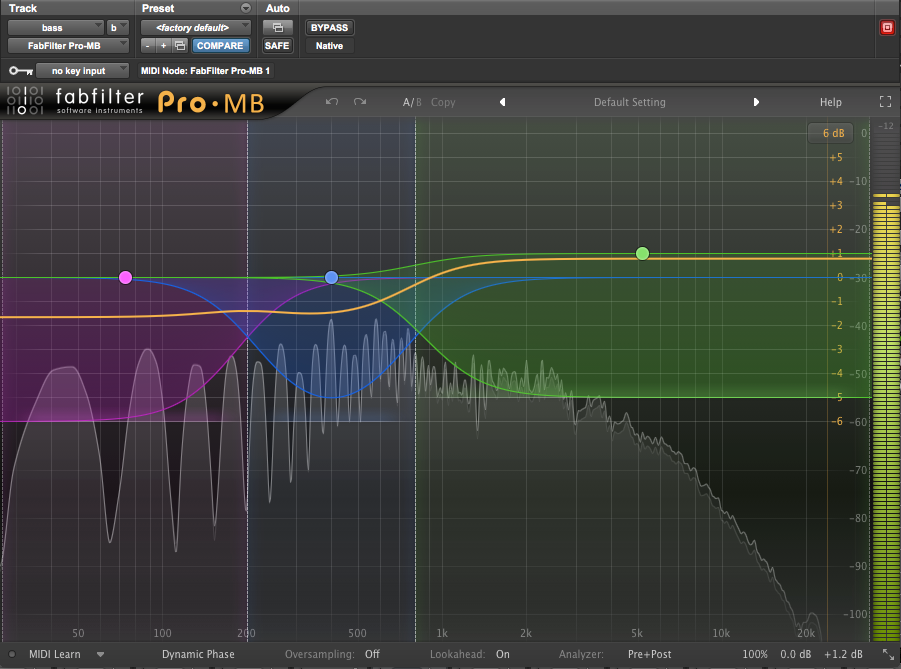
Listen to the bass in the next example. I used 3-band compression on the Fabfilter Pro MB to tame the lower and mid registers without sacrificing too much of the meat of the bass, then gave it a “presence” boost to the high mids and above, compressing the band to make sure the boost doesn’t become overbearing. The bass tightens up in the frequencies where it might otherwise contribute mud to the mix and speaks more clearly in the upper frequencies without risking crowding out the vocals or guitar.
Before
After
5. Increase Separation with Mid/Side Processing
If two mono elements of a mix are competing for space, panning is an easy way to separate them. If two stereo tracks are fighting, some exciting options open up. In addition to tilting either stereo track left or right, narrowing one, widening the other, or doing both can be very useful.

Ready to elevate your ears?
It doesn’t have to take years to train your ears.
Get started today — and you’ll be amazed at how quickly using Quiztones for just a few minutes a day will improve your mixes, recordings, and productions!
Narrowing is fairly straightforward. Pan the left and right sides of the stereo track toward the center (some DAWs make this more straightforward than others, but all have some way to achieve the same effect). Widening a track is a little trickier, but there are some great tools available. Plugins like Waves’ S1 and Center, or UAD’s Precision K-Stereo, have simple controls to increase or decrease stereo width.
Just about any compressor or EQ with mid/side functionality (as opposed to the traditional Left/Right configuration) can be helpful here as well. Mid/side EQ can be used to scoop frequencies from the mid-channel, making them appear to be pushed to the sides (or vice versa).Compression (including multiband compression) can be used in much the same way.
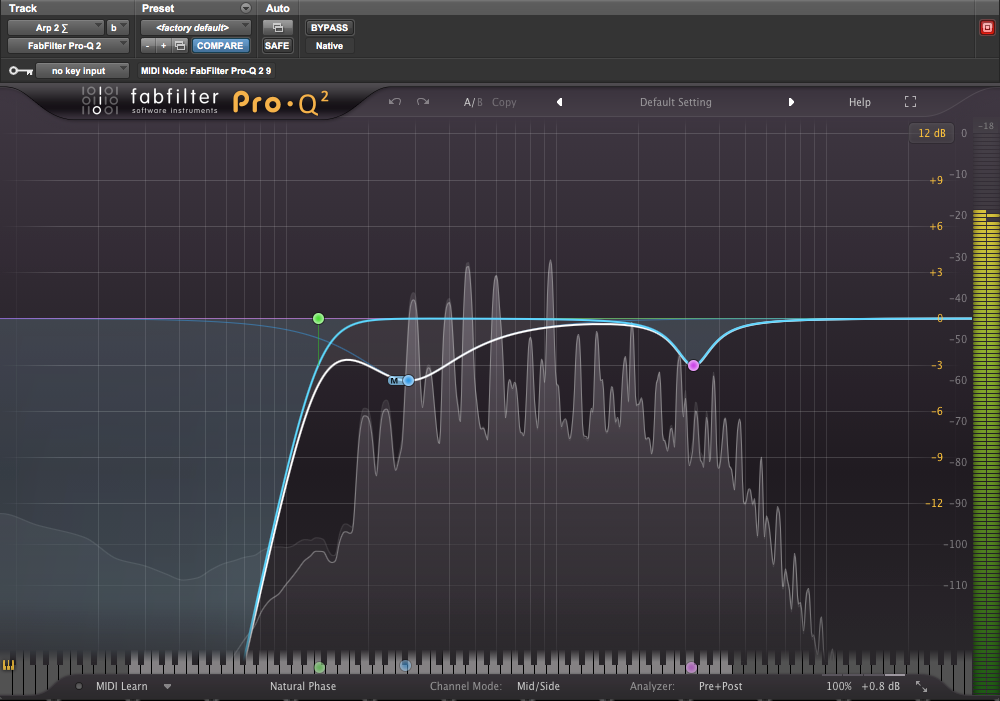
Try compressing the center and mixing in dry signal on the sides. Fabfilter’s Pro-Q, Pro-C, and Pro-MB are three of my favorite tools for this sort of mid/side processing. I used a broad scoop to only the mid-band (note the letter M on the bell) of the arpeggiated synth to clear away frequencies that would compete with the vocal in the center in the example below (from a song by Elio). After adjusting the output gain on the Pro-Q, the synth part pushes to the side, with the reverb on the track becoming more pronounced in the side channel.
Before
After
6. Use Sidechain Compression
You’ve almost definitely heard the “pumping” effect that sidechain compression is often used for. Still, sidechain compression can also be a beneficial tool for carving out space in a mix when used subtly. If you’re unfamiliar with the concept of sidechain compression: route a send from the track that you’d like to clear space for to the sidechain input of a compressor on the track that’s getting in the way. Dial the attack and release to suit the source material. A faster attack usually helps the lead instrument cut better, with the release set to achieve the desired level of transparency.
An even subtler effect can be achieved here by applying the same principle to a multiband compressor. Have the sidechain input trigger only the band where the worst conflict is occurring. A great use of this can be to help a guitar solo cut over rhythm guitars. The articulation of a strummed guitar can still be communicated in higher frequencies from 5-10 kHz that are less important to a more sustained guitar part, which will require more room closer to its fundamental frequencies. Have the lead trigger compression on a band from around 200-2k in the rhythm part.
The energy and movement of the rhythm will still be there, but the lead will have more room to stand out. This effect is similar to carving out room using EQ. With sidechain multiband compression, though, that space is made only when it is needed, leaving the compressed track untouched the rest of the time.
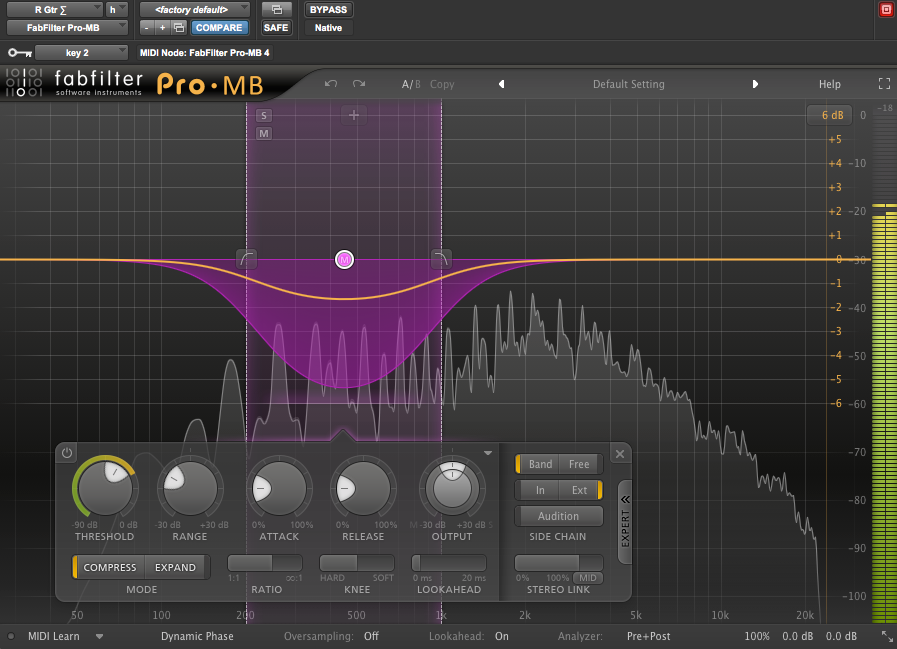
I used this sidechained multiband trick to help the lead guitar rise above the rhythm guitars in the Suicide Mike song you heard earlier. Without the sidechain, the guitars feel indistinct. After, the lead claims its place in the mix. I primarily listen to it when the effects kick in about halfway through this clip.
Before
After
Conclusion
Ultimately, crafting a well-balanced mix will always come down to trusting what our ears are telling us and making decisions with a clear sense of purpose. Understanding the goal of your production choices can take you a long way, and hopefully, now you’ve picked up a couple of new tools to help you hack through the weeds in a busy mix. If you have any favorite tricks for managing midrange, share them in the comments!
Premium Mix Training